
Xcode 11.4 introduced a new feature that you can send Push Notifications to the iOS simulator through simctl command. It no longer must be sent through a back-end application, greatly reducing development time.
The complete code can be found in .
Table of Contents
Confirming Xcode Version
First, the most important thing is to confirm whether the version of Xcode is Xcode 11.4 or above. If not, please upgrade it first before continuing reading.
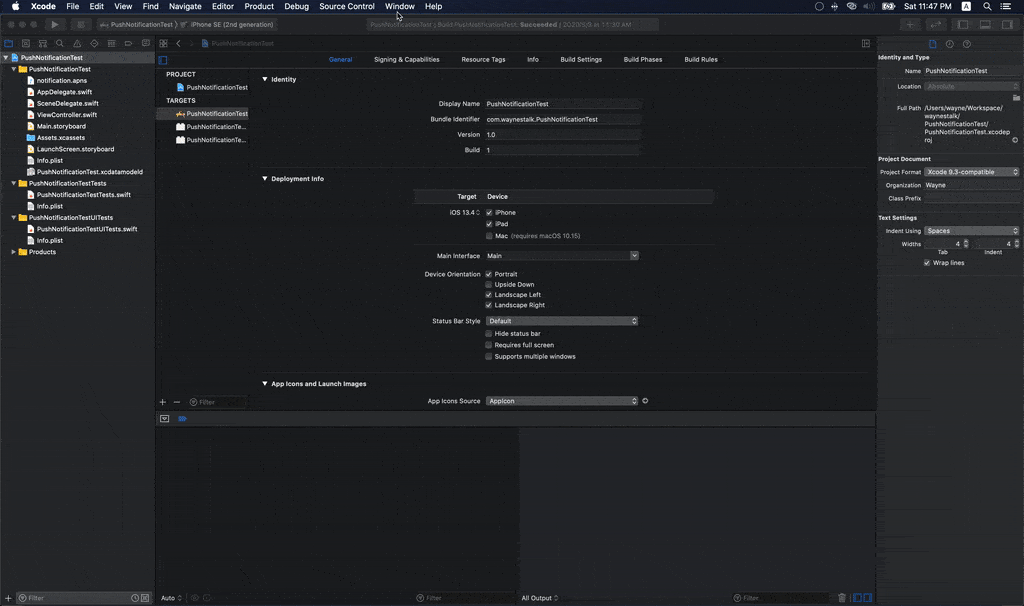
Creating an Xcode Project
First, create an Xcode project, and then include the UserNotifications framework in AppDelegate.swift.
import UserNotifications
In application (_:didDiscardSceneSession:) in AppDelegate.swift, ask users for notification permission.
func application(_ application: UIApplication, didFinishLaunchingWithOptions launchOptions: [UIApplication.LaunchOptionsKey: Any]?) -> Bool {
UNUserNotificationCenter.current().delegate = self
let options: UNAuthorizationOptions = [.alert, .sound, .badge]
UNUserNotificationCenter.current().requestAuthorization(options: options) { (granted, error) in
if granted {
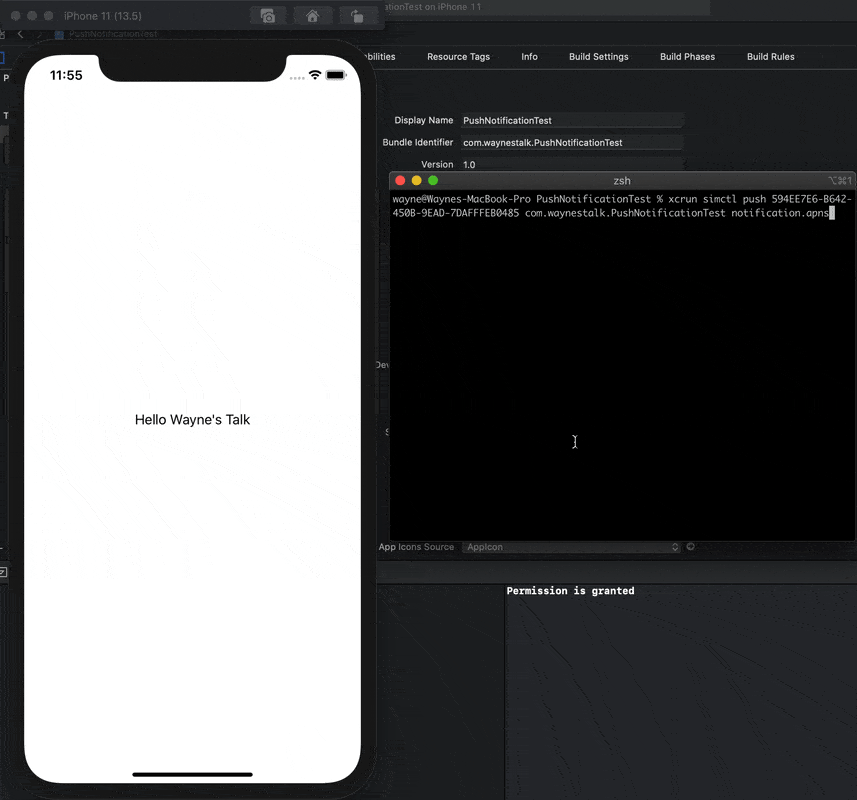
print("Permission is granted")
} else if let error = error {
print("Permission is not granted: \(error)")
}
}
return true
}Then, implement UNUserNotificationCenterDelegate to receive Push Notifications. Add the following code in AppDelegate.swift.
extension AppDelegate: UNUserNotificationCenterDelegate {
    func userNotificationCenter(_ center: UNUserNotificationCenter,
                                willPresent notification: UNNotification,
                                withCompletionHandler completionHandler: @escaping (UNNotificationPresentationOptions) -> Void) {
        let options = UNNotificationPresentationOptions(arrayLiteral: .alert, .sound, .badge)
        completionHandler(options)
    }

    func userNotificationCenter(_ center: UNUserNotificationCenter,
                                didReceive response: UNNotificationResponse,
                                withCompletionHandler completionHandler: @escaping () -> Void) {
        completionHandler()
    }
}
Finally, set AppDelegate to UNUserNotificationCenter.
func application(_ application: UIApplication, didFinishLaunchingWithOptions launchOptions: [UIApplication.LaunchOptionsKey: Any]?) -> Bool {
        UNUserNotificationCenter.current().delegate = self
}
The project can now receive push notifications. Execute the project, and you can see that the App will request notification permission.

Sending Push Notifications to iOS Simulator
The Release Note of Xcode 11.4 mentions how to send Push Notifications with simctl.
% xcrun simctl push <device> com.example.my-app ExamplePush.apns
Where the parameters are:
- <device>: Refers to the identifier of the simulator device. Decide which simulator you use, and then you can find it by the way below.
- com.example.my-app: This is the bundle identifier of the App to receive push notifications.
- ExamplePush.apns: It is the content of push notifications you would like to send.
The bundle identifier of the project in this article is com.waynestalk.PushNotificationTest.
Prepare the file of push notifications. The format is explained in detail here . I won’t explain it in detail here. There is already a simple push notifications file named notification.apns in the project.
{
    "aps": {
        "alert": "Hello Wayne's Talk!",
        "sound": "default",
        "badge": 1
    }
}
Everything is ready. Now, use the command below to send push notifications to the App. Remember run the project first!
% xcrun simctl push F3ED42DB-9DF0-4680-A260-B373A0ACFDC0 com.waynestalk.PushNotificationTest notification.apns
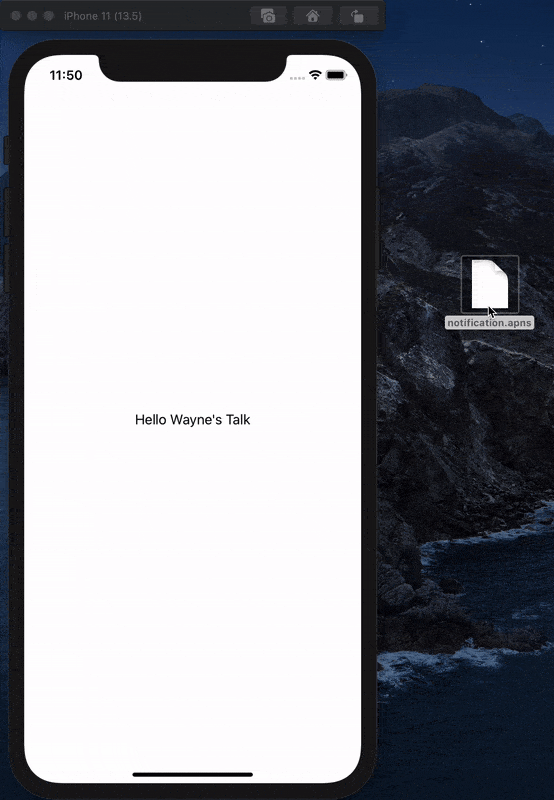
It is really convenient to send push notifications without a back-end application. However, it is troublesome to type the commands every time. In notification.apns, add the bundle identifier of the project to Simulator Target Bundle.
{
    "Simulator Target Bundle": "com.waynestalk.PushNotificationTest",
    "aps": {
        "alert": "Hello Wayne's Talk!",
        "sound": "default",
        "badge": 1
    }
}
Then, drag notification.apns to the simulator to send push notifications.
Conclusion
Xcode 11.4 with this useful feature is a great boon for developers. It provides a way for those who have no back-end applications to send push notifications.


