When developing an Android App, we often need to set a custom font for the entire App. In addition to setting a custom font you want for each TextView, Android provides a way that allows us to set a custom font for the entire App.
The complete code can be found in .
Table of Contents
Downloading Fonts
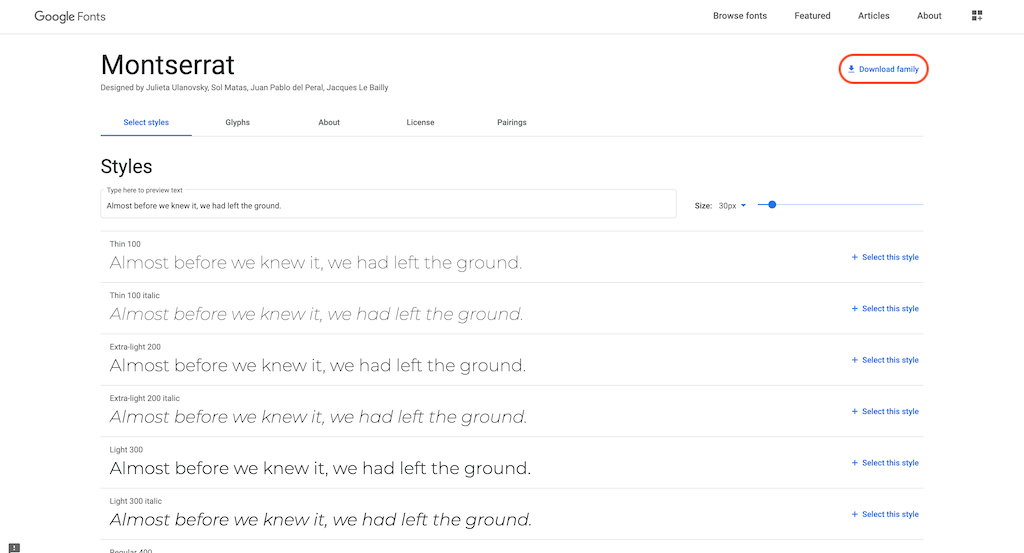
We use Montserrat from Google Fonts as an example. Browse Montserrat’s font website, you can see that Montserrat has many fonts. Click on the top right to download all Montserrat fonts.

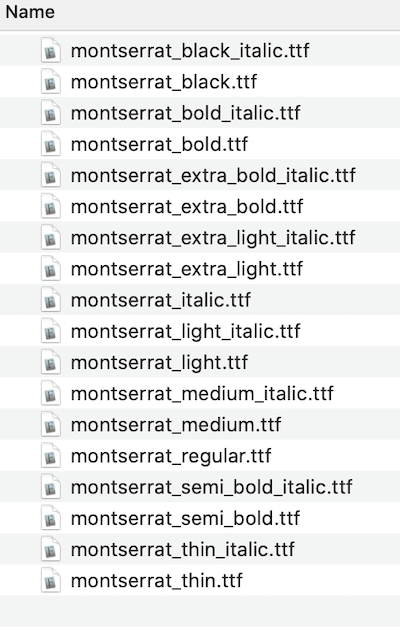
After downloading fonts, unzip the compressed file, you can see the following font files. As described on the site, each font file corresponds to a different weight and italic.

Before moving these fonts into the project, we must first change the file names, because Android project requires file names to be lowercase and underscore (_). We rename all files as follows.

Adding Font Resource
Move these font files into the res/font/ folder in the project. If res/font/ does not exist, please create it first. Then, under res/font/, add an XML file called montserrat.xml, the code is as follows.
<?xml version="1.0" encoding="utf-8"?>
<font-family xmlns:android="http://schemas.android.com/apk/res/android">
    <font
        android:font="@font/montserrat_thin"
        android:fontStyle="normal"
        android:fontWeight="100" />

    <font
        android:font="@font/montserrat_thin_italic"
        android:fontStyle="italic"
        android:fontWeight="100" />

    <font
        android:font="@font/montserrat_extra_light"
        android:fontStyle="normal"
        android:fontWeight="200" />

    <font
        android:font="@font/montserrat_extra_light_italic"
        android:fontStyle="italic"
        android:fontWeight="200" />

    <font
        android:font="@font/montserrat_light"
        android:fontStyle="normal"
        android:fontWeight="300" />

    <font
        android:font="@font/montserrat_light_italic"
        android:fontStyle="italic"
        android:fontWeight="300" />

    <font
        android:font="@font/montserrat_regular"
        android:fontStyle="normal"
        android:fontWeight="400" />

    <font
        android:font="@font/montserrat_italic"
        android:fontStyle="italic"
        android:fontWeight="400" />

    <font
        android:font="@font/montserrat_medium"
        android:fontStyle="normal"
        android:fontWeight="500" />

    <font
        android:font="@font/montserrat_medium_italic"
        android:fontStyle="italic"
        android:fontWeight="500" />

    <font
        android:font="@font/montserrat_semi_bold"
        android:fontStyle="normal"
        android:fontWeight="600" />

    <font
        android:font="@font/montserrat_semi_bold_italic"
        android:fontStyle="italic"
        android:fontWeight="600" />

    <font
        android:font="@font/montserrat_bold"
        android:fontStyle="normal"
        android:fontWeight="700" />

    <font
        android:font="@font/montserrat_bold_italic"
        android:fontStyle="italic"
        android:fontWeight="700" />

    <font
        android:font="@font/montserrat_extra_bold"
        android:fontStyle="normal"
        android:fontWeight="800" />

    <font
        android:font="@font/montserrat_extra_bold_italic"
        android:fontStyle="italic"
        android:fontWeight="800" />

    <font
        android:font="@font/montserrat_black"
        android:fontStyle="normal"
        android:fontWeight="900" />

    <font
        android:font="@font/montserrat_black_italic"
        android:fontStyle="italic"
        android:fontWeight="900" />
</font-family>
In montserrat.xml, each font file has its corresponding <font>.
- android:font: Specify the corresponding font file.
- android:fontStyle: Set the font to be normal or italic.
- android:fontWeight: Set the thickness of the font. This fontWeight value is detailed on the Google Font Montserrat, and the corresponding list can also be found on FontWeight .
Of course, you don’t have to set all fonts in montserrat.xml. Assume you don’t set montserrat_bold (fontWeight is 700), then when you set the textStyle of TextView to bold, the normal font will be displayed. So it is recommended to add them all at the beginning.
<TextView
  android:id="@+id/textView"
  android:layout_width="wrap_content"
  android:layout_height="wrap_content"
  android:layout_weight="1"
  android:text="Wayne's Talk"
  android:textStyle="bold" />
Setting Custom font
Next, we want to make our project use montserrat.xml as the default font. In res/themes/themes.xml, add an <item> as follows.
<resources xmlns:tools="http://schemas.android.com/tools">
    <!-- Base application theme. -->
    <style name="Theme.AndroidFontExample" parent="Theme.MaterialComponents.DayNight.DarkActionBar">
        <!-- Primary brand color. -->
        <item name="colorPrimary">@color/purple_500</item>
        <item name="colorPrimaryVariant">@color/purple_700</item>
        <item name="colorOnPrimary">@color/white</item>
        <!-- Secondary brand color. -->
        <item name="colorSecondary">@color/teal_200</item>
        <item name="colorSecondaryVariant">@color/teal_700</item>
        <item name="colorOnSecondary">@color/black</item>
        <!-- Status bar color. -->
        <item name="android:statusBarColor" tools:targetApi="l">?attr/colorPrimaryVariant</item>
        <!-- Customize your theme here. -->
        <item name="fontFamily">@font/montserrat</item>
    </style>
</resources>
That’s all!
SDK Version Requirements
<font> requires SDK version 26 or higher, so set minSdkVersion to 26 or higher in build.gralde.
...
android {
    compileSdkVersion 29
    buildToolsVersion "29.0.3"

    defaultConfig {
        applicationId "com.waynestalk.androidfontexample"
        minSdkVersion 26
        targetSdkVersion 29
        versionCode 1
        versionName "1.0"
    }
}
...
Testing
Replace the following code to activity_main.xm. We don’t need to set fontFamily for <TextView>. Also, when textStyle is set to bold, it will also display Montserrat’s Bold font.
<?xml version="1.0" encoding="utf-8"?>
<LinearLayout xmlns:android="http://schemas.android.com/apk/res/android"
    xmlns:tools="http://schemas.android.com/tools"
    android:layout_width="match_parent"
    android:layout_height="match_parent"
    android:orientation="vertical"
    tools:context=".MainActivity">

    <LinearLayout
        android:layout_width="match_parent"
        android:layout_height="wrap_content"
        android:orientation="horizontal">
        <TextView
            android:id="@+id/textView"
            android:layout_width="wrap_content"
            android:layout_height="wrap_content"
            android:layout_weight="1"
            android:text="Regular" />

        <TextView
            android:id="@+id/textView2"
            android:layout_width="wrap_content"
            android:layout_height="wrap_content"
            android:layout_weight="1"
            android:text="Wayne's Talk"
            android:textStyle="normal" />
    </LinearLayout>

    <LinearLayout
        android:layout_width="match_parent"
        android:layout_height="wrap_content"
        android:orientation="horizontal">
        <TextView
            android:id="@+id/textView3"
            android:layout_width="wrap_content"
            android:layout_height="wrap_content"
            android:layout_weight="1"
            android:text="Bold" />

        <TextView
            android:id="@+id/textView4"
            android:layout_width="wrap_content"
            android:layout_height="wrap_content"
            android:layout_weight="1"
            android:text="Wayne's Talk"
            android:textStyle="bold" />
    </LinearLayout>
</LinearLayout>


