When developing iOS Apps, it is often necessary to set borders, radiuses or shadows. This article not only introduces how to achieve it programmatically, but also how to set it directly in Xcode’s Attributes Inspector.
The complete code can be found in .
Table of Contents
Setting a Border, Radius, Shadow with CALayer
The direct way is to use CALayer.
@IBOutlet weak var button: UIButton!

override func viewDidLoad() {
    super.viewDidLoad()

    button.layer.cornerRadius = 5
    button.layer.borderWidth = 1
    button.layer.borderColor = UIColor.green.cgColor

    button.backgroundColor = .red // Set background to red so that it will be easier to see the shadow
    button.layer.shadowRadius = 5
    button.layer.shadowOpacity = 1
    button.layer.shadowOffset = .zero
    button.layer.shadowColor = UIColor.gray.cgColor
}
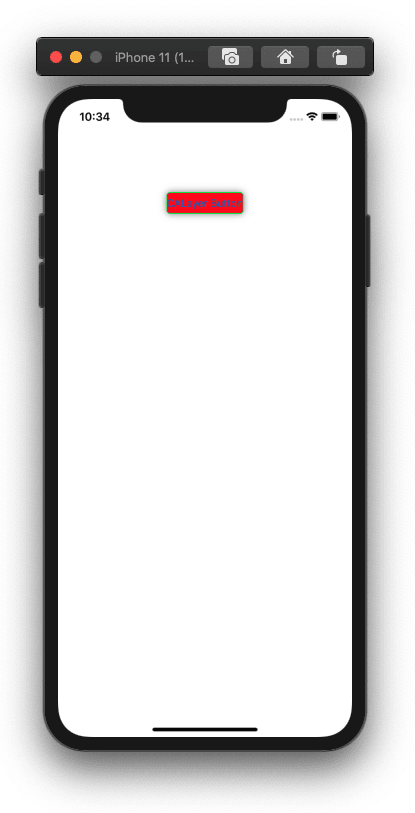
The above setting will make the button have the following effect.

CALayer can produce beautiful results in just a few lines.
As you write the program, you will get tired of CALayer. There are so many UI components in an App to set borders or radiuses. These lines of code will flood your entire project. That turns out your code becomes difficult to read.
Setting Borders, Radiuses, Shadows in Attributes Inspector
In order to solve the problem caused by CALayer, you can use Xcode’s Attributes Inspector to solve it. The picture below shows Attributes Inspector. We have used it all the time, but may not remember its name. The one on its left is called Identity Inspector, and so on.

Image if you can set borders, radiuses and shadows in Attributes Inspector, it would be really convenient. It can also solve the problem of repeated CALayer code. Next, we will introduce how to add more attribute settings in Attributes Inspector.
Add a file called AttributedInspector.swift, and paste the code below. That’s it. It’s very simple.
import UIKit

@IBDesignable class DesignableView: UIView {
}

@IBDesignable class DesignableButton: UIButton {
}

extension UIView {
    @IBInspectable var cornerRadius: CGFloat {
        get {
            layer.cornerRadius
        }
        set {
            layer.cornerRadius = newValue
        }
    }

    @IBInspectable var borderWidth: CGFloat {
        get {
            layer.borderWidth
        }
        set {
            layer.borderWidth = newValue
        }
    }

    @IBInspectable var borderColor: UIColor? {
        get {
            if let color = layer.borderColor {
                return UIColor(cgColor: color)
            }
            return nil
        }
        set {
            if let color = newValue {
                layer.borderColor = color.cgColor
            } else {
                layer.borderColor = nil
            }
        }
    }

    @IBInspectable var shadowRadius: CGFloat {
        get {
            layer.shadowRadius
        }
        set {
            layer.shadowRadius = newValue
        }
    }

    @IBInspectable var shadowOpacity: Float {
        get {
            layer.shadowOpacity
        }
        set {
            layer.shadowOpacity = newValue
        }
    }

    @IBInspectable var shadowOffset: CGSize {
        get {
            layer.shadowOffset
        }
        set {
            layer.shadowOffset = newValue
        }
    }

    @IBInspectable var shadowColor: UIColor? {
        get {
            if let color = layer.shadowColor {
                return UIColor(cgColor: color)
            }
            return nil
        }
        set {
            if let color = newValue {
                layer.shadowColor = color.cgColor
            } else {
                layer.shadowColor = nil
            }
        }
    }
}
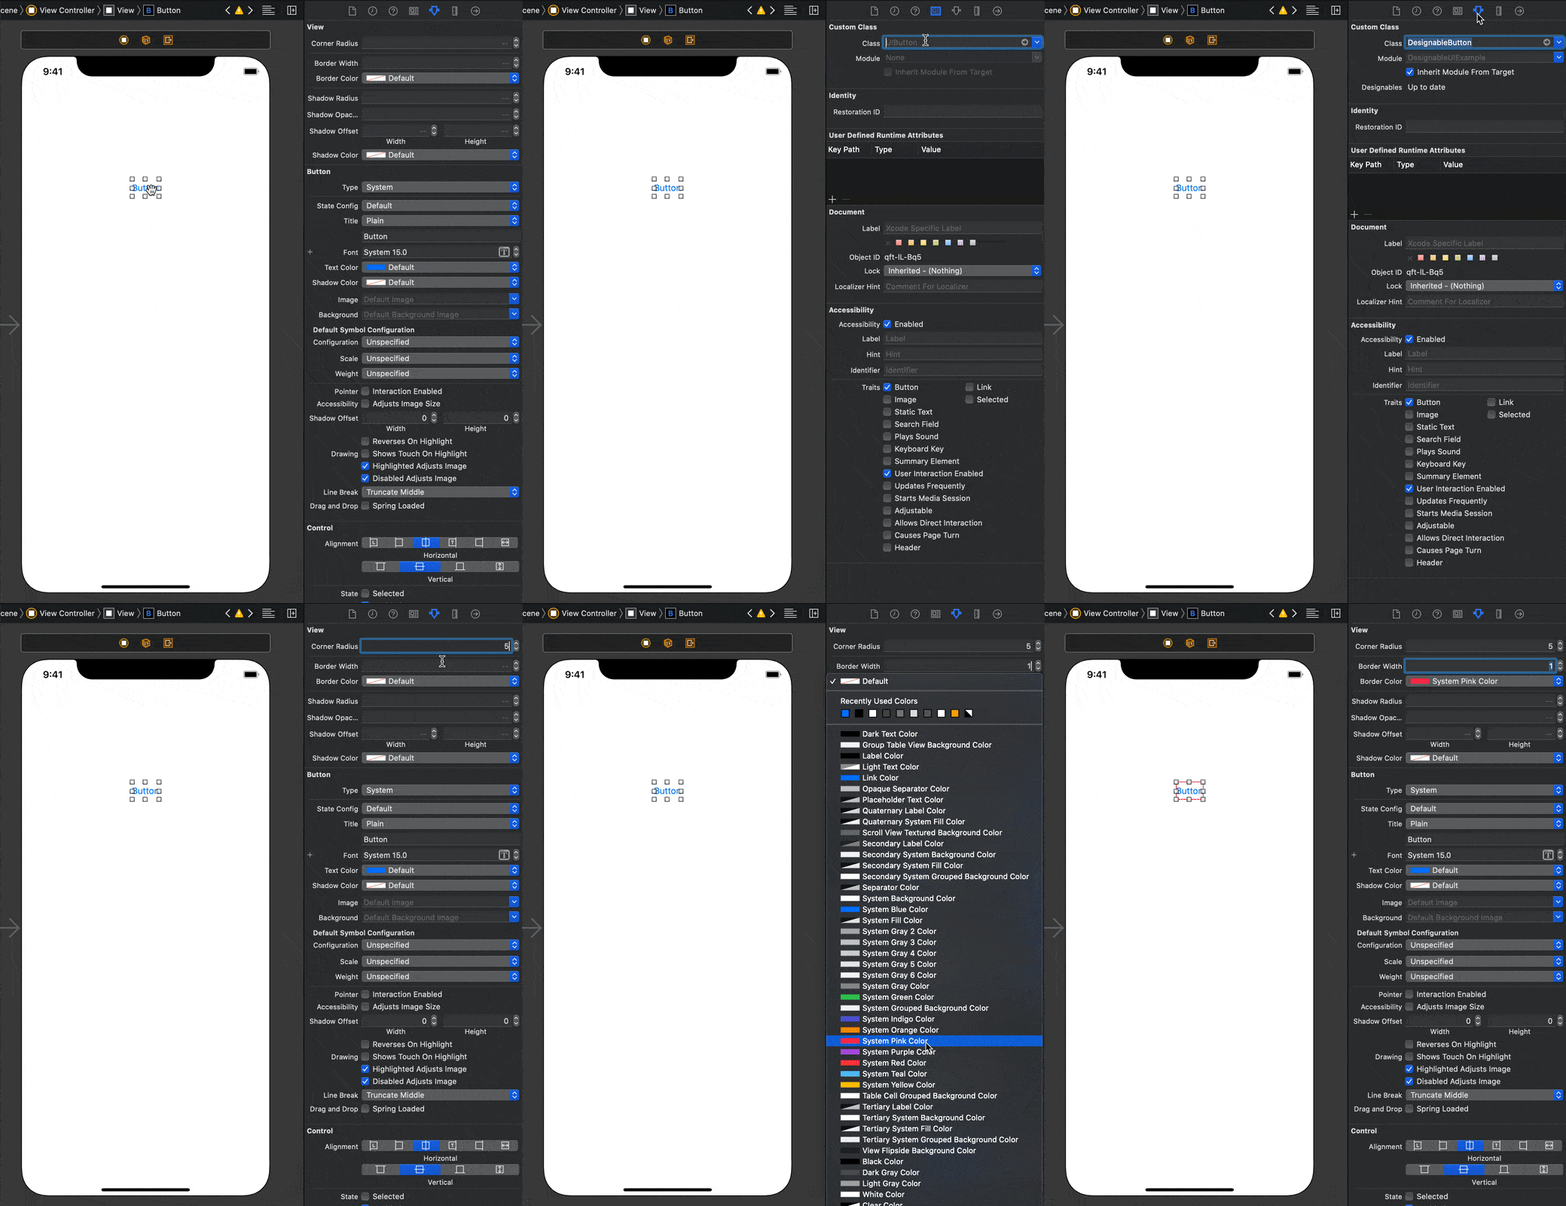
Try the following steps:
- Add an UIButton to a storyboard.
- In Identity Inspector of the button, set the Class property to DesignableButton, which is just declared in the code above.
- Switch to Attributes Inspector of the button, and you can see the attribute settings of borders, radiuses and shadows.

Integrating CocoaPods
If it is a CocoaPods project, add the above code will cause an error. To solve it, add the following code at the end of Podfile.
post_install do |installer|
    installer.pods_project.targets.each do |target|
        target.build_configurations.each do |config|
            config.build_settings.delete('CODE_SIGNING_ALLOWED')
            config.build_settings.delete('CODE_SIGNING_REQUIRED')
        end
    end
    installer.pods_project.build_configurations.each do |config|
        config.build_settings.delete('CODE_SIGNING_ALLOWED')
        config.build_settings.delete('CODE_SIGNING_REQUIRED')
    end
end
Conclusion
Using Attributes Inspector can save a lot of repetitive code, increase the readability of the code, and indirectly reduce the number of bugs. In addition to UIButton, you can also add property settings for UILabel and UIImageView.


